HOW TO COOK:
An ongoing series for beginners who might not know the first thing about food but would still like to throw a nice meal together once in a while. Nothing outrageous, just simple and tasty cooking.
HOW TO COOK THE PERFECT STEAK:
Arguably, there isn’t a more contentious statement — at least with all my fellow meat-loving, beer-swilling, backyard wannabe pitmasters — because if you ask a dozen people “how do I cook a steak?” you’ll get two dozen answers. So to cut through all the grillsplaining — here’s a simple technique to cook the perfect steak.
THE REVERSE SEAR:
Really, the name says it all. You’re going to cook the inside of your steak first, then sear the outside. This technique gives you the most control over your steak and works for both medium and gargantuan thick cuts of beef — let’s say anything thicker than ¾ of an inch — don’t bother with it if you have a paper-thin piece of wagyu, for example, because you’ll just need a little kiss of heat on each side so the reverse sear is overkill and will overcook that type of beef.
PREP:
So there are a few things you’ll need before you sink your teeth into that juicy cut of beef.
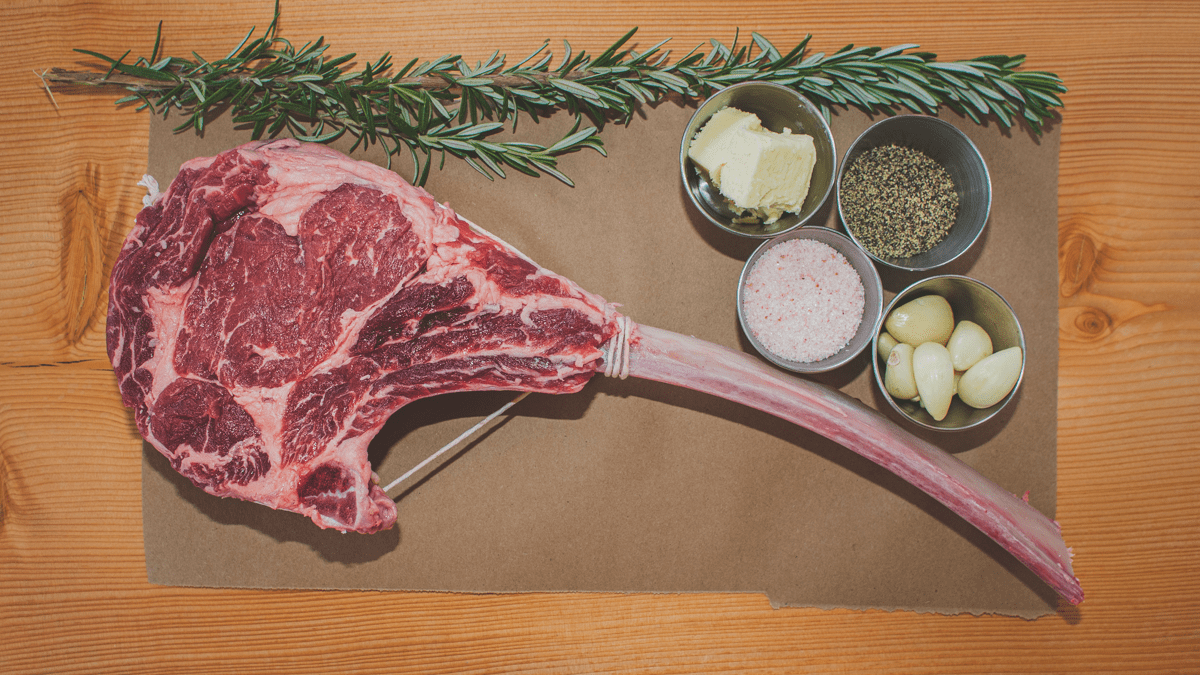
You’ll need a steak.
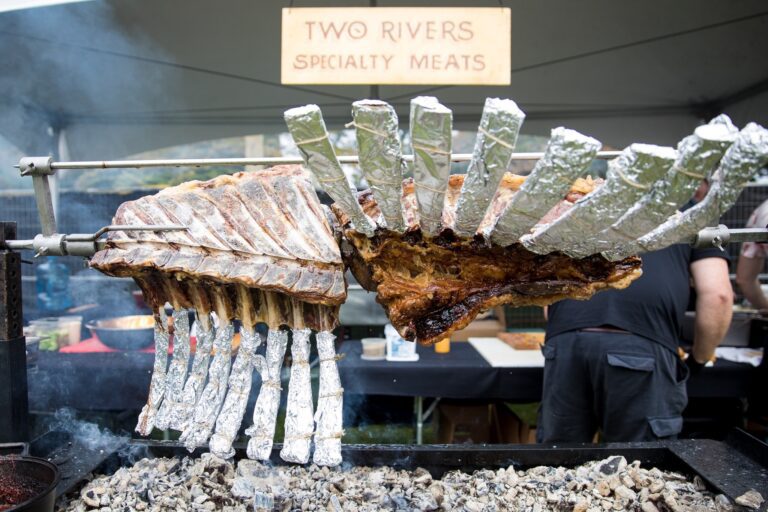
This is an obvious one, but since picking the right steak could spark a rather long discussion, I’ll skip diving into this too deeply. If you’re really curious, just head to your local butcher (like Two Rivers) and ask a few questions. I’ll ramble on about the different cuts in future posts.
You need a heat source.
A hot pan, grill, oven, sous vide, a Volkswagen’s vinyl seats on a smoking hot day – you get the idea.
For the sake of these instructions, let’s just say you’re using a grill. Yes, you could easily use an oven and a hot pan, like a fancy French restaurant, but let’s assume you don’t have access to an industrial hood vent and don’t want to smoke out your roommates.
You’ll need seasoning.
Kosher salt, pepper, garlic. You can get extra fancy and have some butter and a rosemary sprig on the side, but really you just need a little salt.Let’s dive into salt for a second because it often comes up. So, why salt the steak? Well, salt draws out the natural moisture and then allows the meat to reabsorb that juice (along with the salt) creating a dry brine that helps to break down the lean muscle proteins and makes the final steak more juicy and even more tender. Thank you science!
Salting early (at least one hour before cooking) allows the salt to draw the precious juices out, and then re-absorb them back into the meat. You need to allow additional time if you’re cooking an impressively thick cut.
Salting seconds before cooking is just like seasoning any meat when cooking, but with the added bonus for steak — helping make a beautiful hard sear. This is great for a hot pan sear when you’re trying to create a crust around the precious, precious meats.
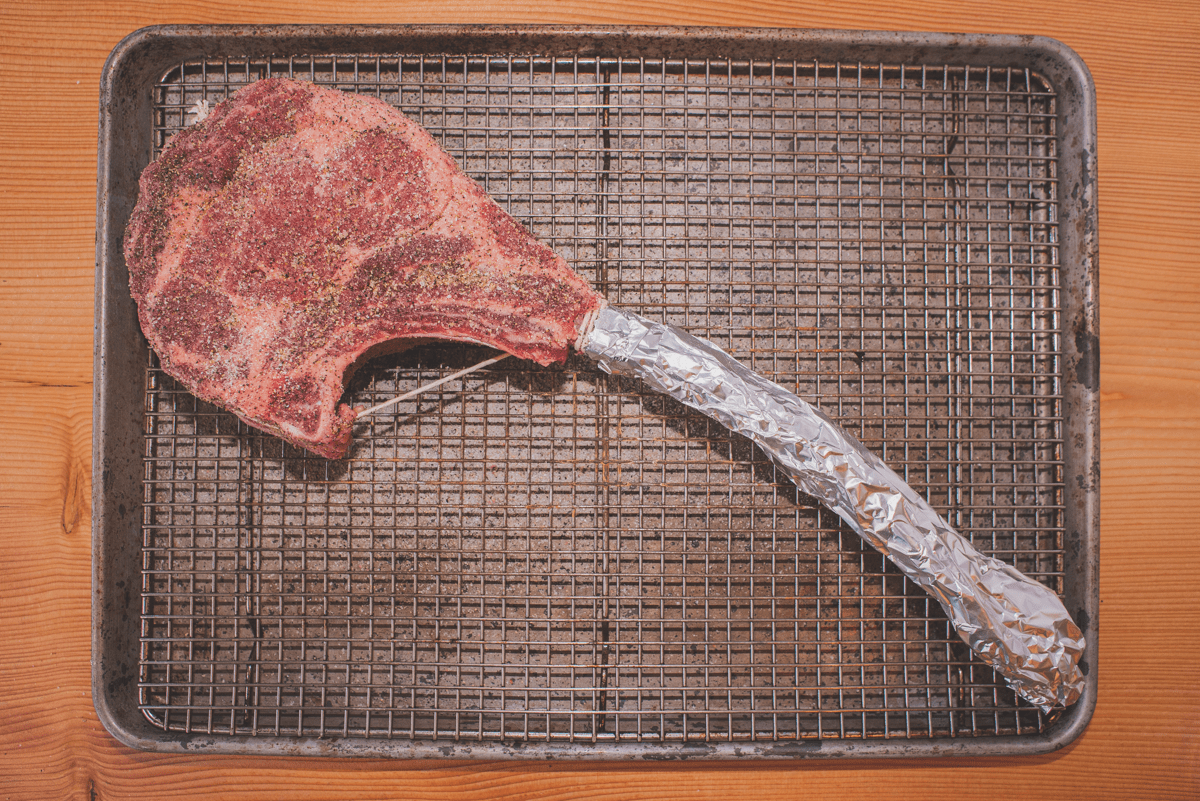
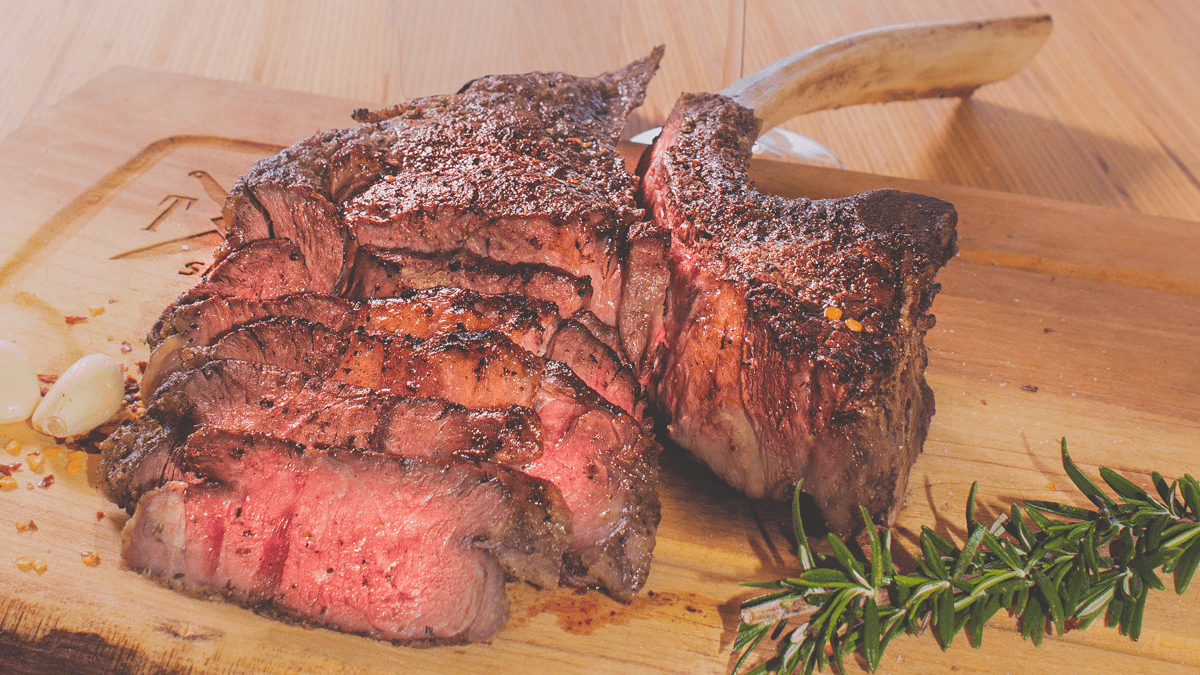
(BONUS STEP FOR BONES)
If you’re cooking a spectacle of a steak, like the tomahawk pictured here, with a Frenched bone, you’ll want to cover that with foil. Really, this is just for display as the foil helps avoid burning and charing that beautiful bone.
COOKING:
Step 1:
Season your steak by liberally covering it with salt and pepper — use a coarse, kosher salt — you want those nice, thick salt crystals.
Step 2:
Then set your grill for indirect cooking — as in, not directly on the fire — so if you’re using charcoal, set your coals to one side of the barbecue and if you’re using a grill, leave one side of the burners off.
Step 3:
Bring steak to internal temp of 120F (for med-rare) — use whatever you have, sous vide, oven with a rack and sheet or on the side of your grill without fire.
That means we’re going to need a meat thermometer. Don’t worry about any “touch the meat” techniques, or how your palm feels or any other fancy approach you’ve seen on YouTube — no egos here because this is all about the steak. A good thermometer is your friend.
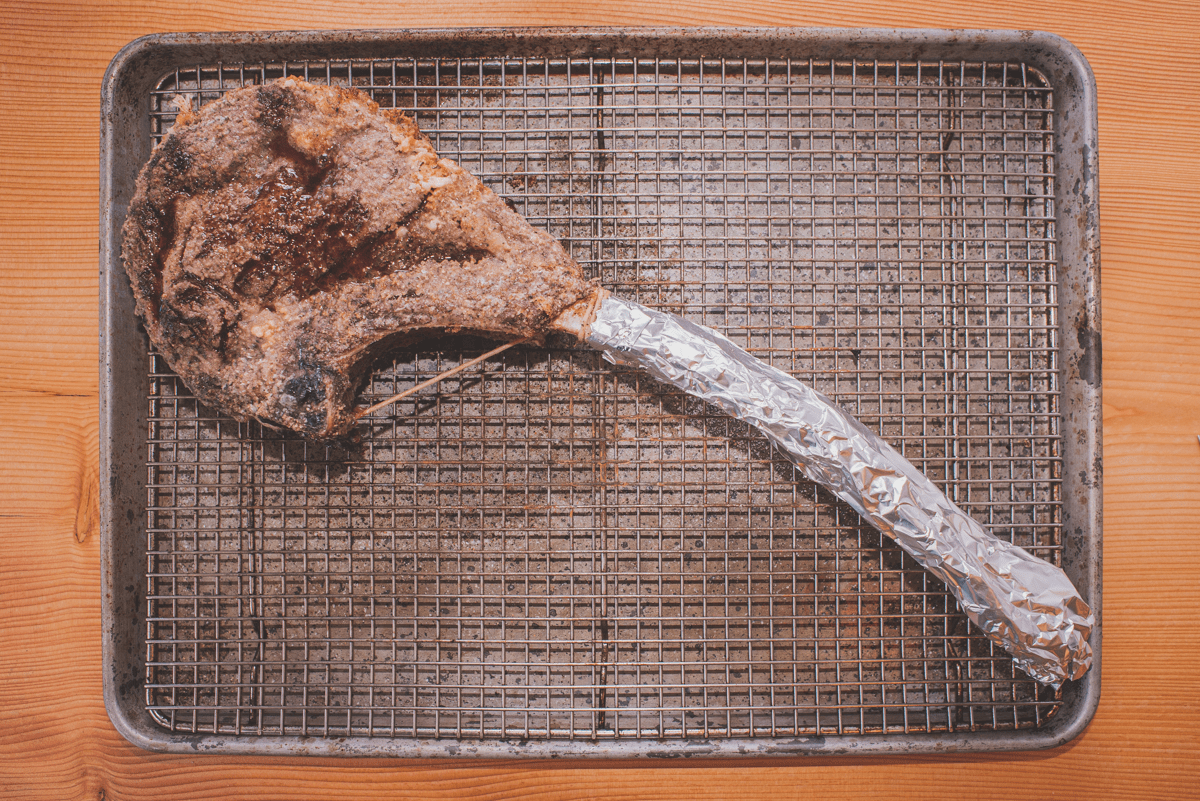
Step 4:
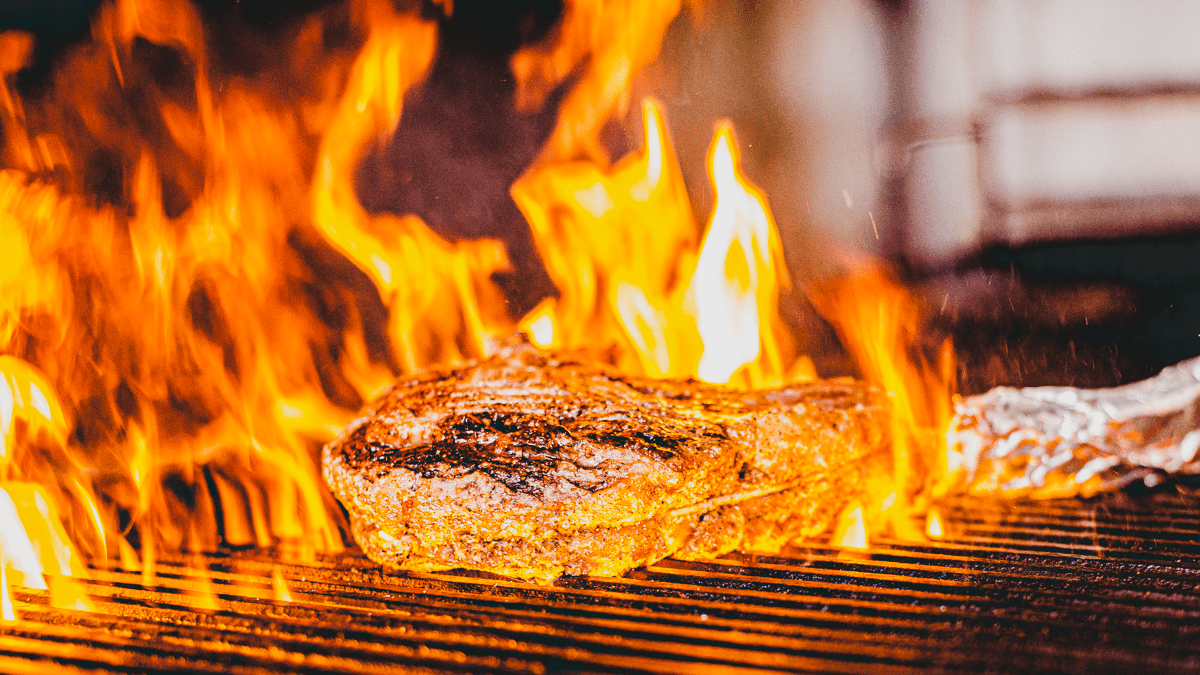
Once it’s up to temp, you’ll notice that it’s not exactly a “sexy” steak, but don’t worry. It has all come down to this — it’s time for fire! Let’s sear the Dickens out of that steak and give it some char to make it the most delicious-looking and tasting steak you’ve ever made.
Place your steak directly on the flames of your grill (or scorchingly-hot pan) for a maximum of 1-2 minutes each side.
Step 4a: (BONUS STEP)
Melt some butter and mix in some garlic. Just as you place your steak on the fire, baste each side with the flavoury butter mixture. Use a rosemary sprig as your brush if you really want to get fancy.
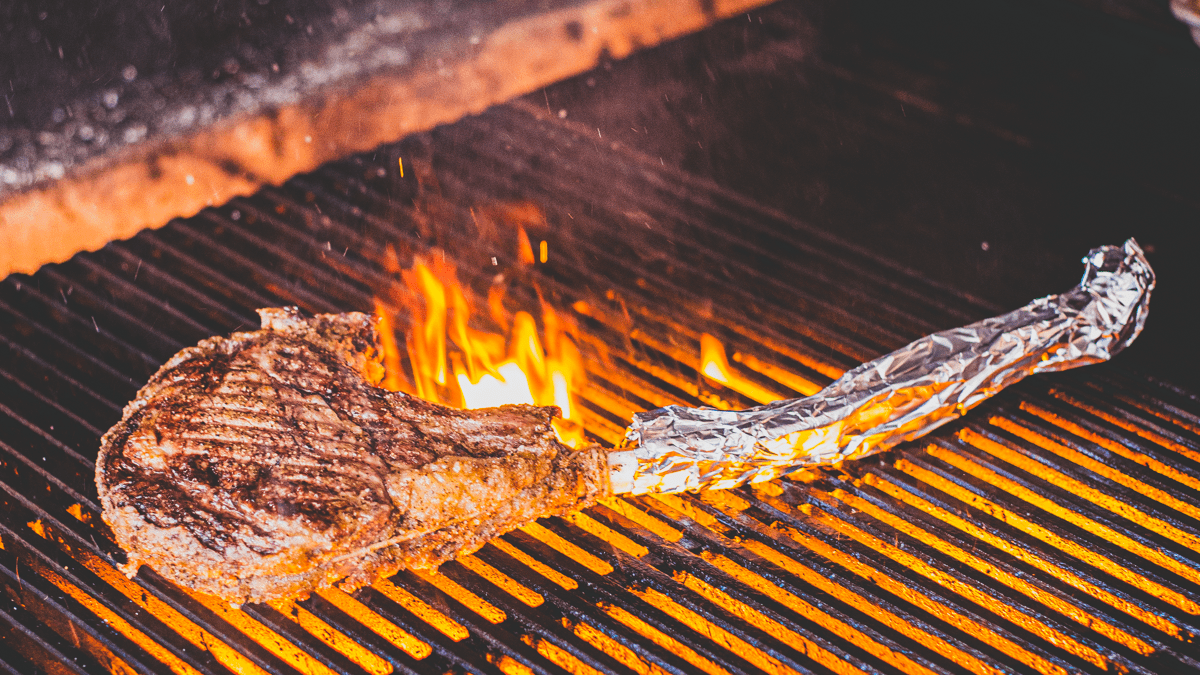
Ahhhh open fire cooking. You could always pan-sear, like a civilized person, but there’s something primordial about fire — it’s magical and captivating. I just love it.
Step 5:
Time to rest, the steak. Remove the meat and wrap it in foil — throw in that rosemary sprig and any leftover garlic if you want — then let it sit for a few minutes. We’re aiming for a final internal temperature between 130-140F (for medium-rare). Remember, your steak is still cooking, it’s also reabsorbing some of those juices, fats, proteins and delicious buttery goodness.

Step 6:
Slice thin pieces against the grain. Look closely at your steak and you’ll see some fibres running in parallel lines, you’re going to cut perpendicular to them. This is another important step that, well, it’s basically like pre-chewing your already tender cut of meat.
CONCLUSION:
So this might not be the simplest way to cook meat, but along with a good thermometer, it’s the most idiot-proof.
You can always add a topping like a salsa verde, a chimichurri, a red wine and mushroom sauce or whatever you feel will enhance the flavour. Or heck, just serve it Au Naturel. You’ve worked hard on this meat. Show it off!